swagger
相信无论是前端还是后端开发,都或多或少地被接口文档折磨过。前端经常抱怨后端给的接口文档与实际情况不一致。后端又觉得编写及维护接口文档会耗费不少精力,经常来不及更新。其实无论是前端调用后端,还是后端调用后端,都期望有一个好的接口文档。但是这个接口文档对于程序员来说,就跟注释一样,经常会抱怨别人写的代码没有写注释,然而自己写起代码起来,最讨厌的,也是写注释。所以仅仅只通过强制来规范大家是不够的,随着时间推移,版本迭代,接口文档往往很容易就跟不上代码了。
导入相关依赖
1
2
3
4
5
6
7
8
9
10
11
12
|
<dependency>
<groupId>io.springfox</groupId>
<artifactId>springfox-swagger2</artifactId>
<version>2.9.2</version>
</dependency>
<dependency>
<groupId>io.springfox</groupId>
<artifactId>springfox-swagger-ui</artifactId>
<version>2.9.2</version>
</dependency>
|
编写hello controller
1
2
3
4
5
6
7
8
9
| @RestController
public class HelloController {
@GetMapping("/hello")
public String hello(){
return "hello,swagger";
}
}
|
swagger配置类
1
2
3
4
5
6
7
8
9
10
11
12
13
14
15
16
17
18
19
20
21
22
23
24
25
| @Configuration
@EnableSwagger2
public class SwaggerConfig {
@Bean
public Docket docket(){
return new Docket(DocumentationType.SWAGGER_2).
apiInfo(apiInfo());
}
private ApiInfo apiInfo(){
Contact contact = new Contact("dwf","https://dwf0920.github.io/","dwf@0920@163.com");
return new ApiInfo(
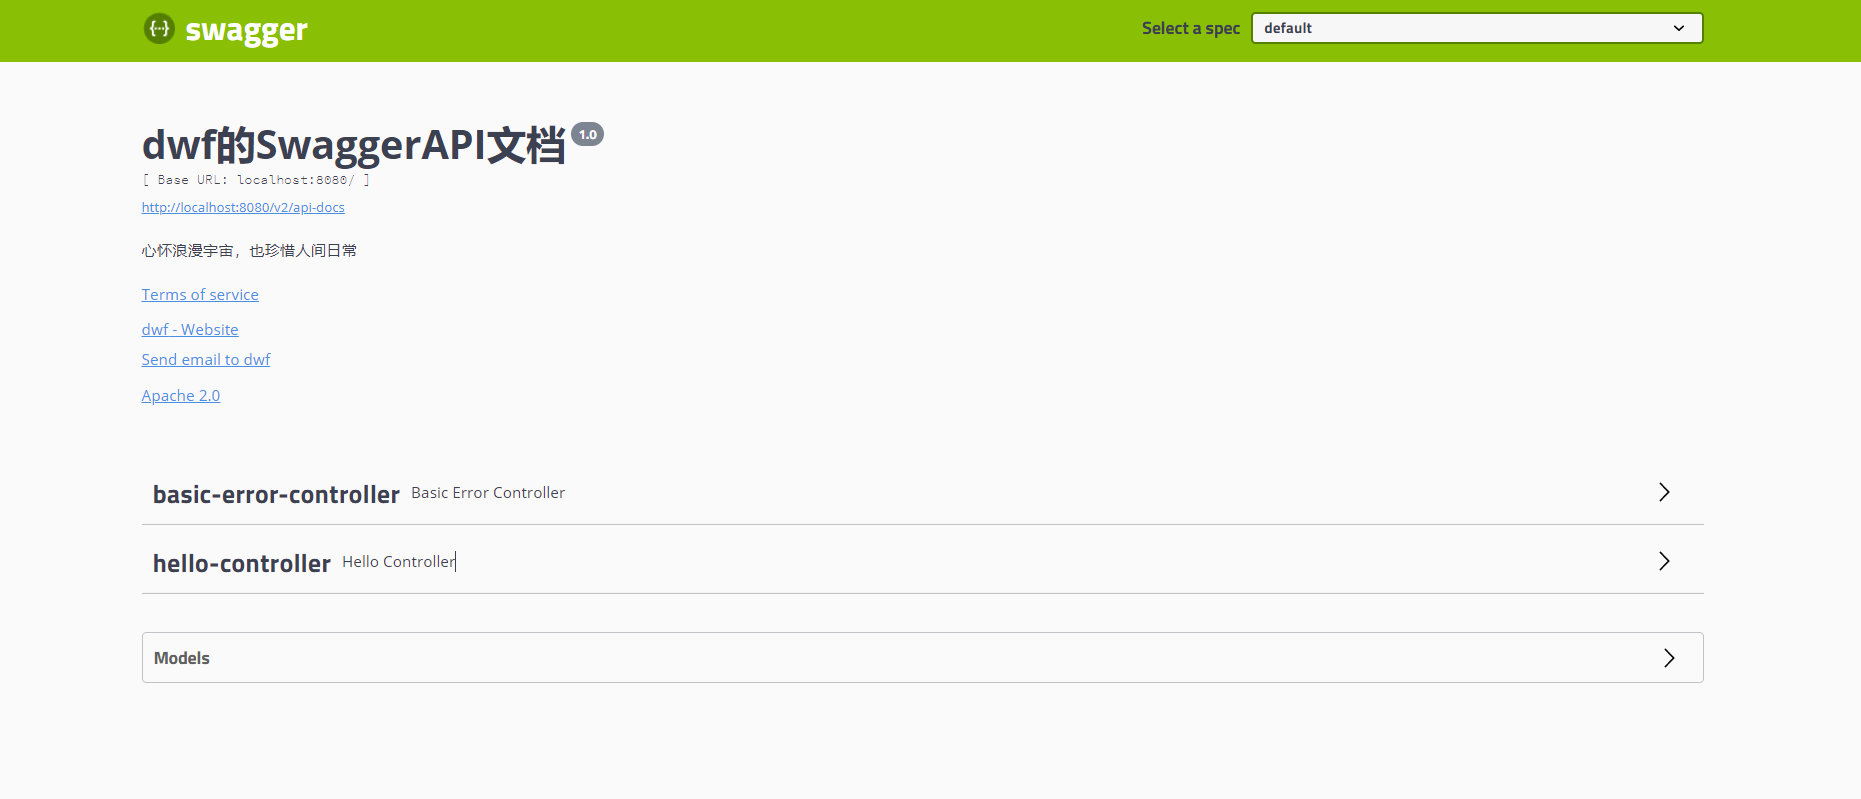
"dwf的SwaggerAPI文档",
"心怀浪漫宇宙,也珍惜人间日常",
"1.0",
"urn:tos",
contact,
"Apache 2.0",
"http://www.apache.org/licenses/LICENSE-2.0",
new ArrayList());
}
}
|
启动项目,访问测试 http://localhost:8080/swagger-ui.html 看下效果
swagger配置扫描接口
1
2
3
4
5
6
7
8
9
10
11
12
| @Bean
public Docket docket(){
return new Docket(DocumentationType.SWAGGER_2).
apiInfo(apiInfo()).
select().
apis(RequestHandlerSelectors.basePackage("com.dwf.controller")).
build();
}
|
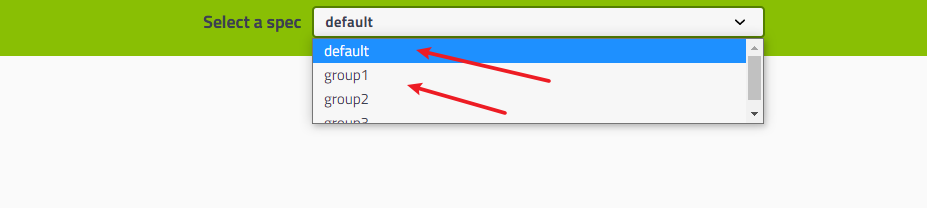
配置API文档分组
配置多个组只需要配置多个Docket即可
1
2
3
4
5
6
7
8
9
10
11
12
13
|
@Bean
public Docket docket1(){
    return new Docket(DocumentationType.SWAGGER_2).groupName("group1");
}
@Bean
public Docket docket2(){
    return new Docket(DocumentationType.SWAGGER_2).groupName("group2");
}
@Bean
public Docket docket3(){
    return new Docket(DocumentationType.SWAGGER_2).groupName("group3");
}
|
重启项目查看
实体配置
新建一个实体类
1
2
3
4
5
6
7
| @ApiModel("用户实体类")
public class User {
@ApiModelProperty("用户名")
public String name;
@ApiModelProperty("密码")
public String password;
}
|
编写请求接口
1
2
3
4
| @PostMapping("/user")
public User user(){
return new User();
}
|
重启项目查看效果

注:并不是因为@ApiModel这个注解让实体显示在这里了,而是只要出现在接口方法的返回值上的实体都会显示在这里,而@ApiModel和@ApiModelProperty这两个注解只是为实体添加注释的。
@ApiModel为类添加注释
@ApiModelProperty为类属性添加注释
常用注解
| Swagger注解 |
简单说明 |
| @Api(tags = “xxx模块说明”) |
作用在模块类上 |
| @ApiOperation(“xxx接口说明”) |
作用在接口方法上 |
| @ApiModel(“xxxPOJO说明”) |
作用在模型类上:如VO、BO |
| @ApiModelProperty(value = “xxx属性说明”,hidden = true) |
作用在类方法和属性上,hidden设置为true可以隐藏该属性 |
| @ApiParam(“xxx参数说明”) |
作用在参数、方法和字段上,类似@ApiModelProperty |
1
2
3
4
5
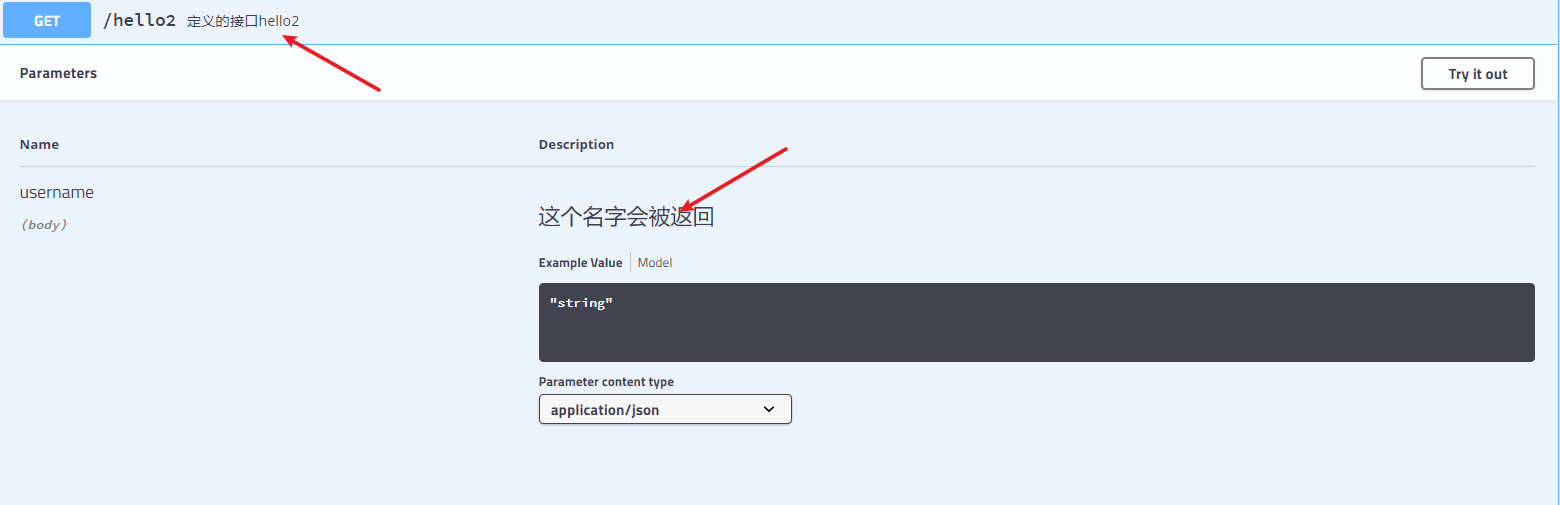
| @ApiOperation("定义的接口hello2")
@GetMapping("/hello2")
public String hello2(@ApiParam("这个名字会被返回")String username){
return "hello"+username;
}
|